That's it?

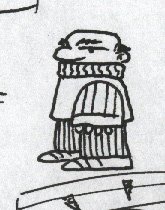
Since there has been a serious lack of staff meetings, which have resulted in a serious lack of staff meeting sketches, which have resulted in a serious lack of Monday Night Staff Meeting Sketches Posts, I have decided to take actions into my own hands. You may now leave a comment in the form of a long, boring, uneventful staff meeting, and I promise to draw something during your comment. It will be almost like the real thing. Until that time, here's a guy in a turtleneck.
Comments

Dan said…
Replacing secondary safty drainage lines to your existing gutters is not only a preventive matinance measure it is also an expensive procedure that will only cause more corrosive damage and moss build up over a twelve and a have day period. Start by placing seven stray cats at the base of the downspout so that if there is leakage you will have significant time to hear the alarm if needed to put your safty gear on. To procede to the next step make sure the primary flange you bought at any local spam dealer has the correct blue coating and yello hinge replacement caps. Take these items and gouge out the old retaining rim by hammer and sawing the nearby cusping clamps. Once these are flipped in a semi reversed counter clockwise measure will you be able to fit the clogg wheels into place. These clogg wheels move the fluid which you will fill later after step seven. More importantly step four has many critical cascading sequences that must be overlooked to prevent faulty vaulve failure. Simply tie flose around the fitting and it will hold secure. Now that you have started the assembly make sure you spray coated everything with epoxiy enamel before you begin any fitting of the lower drive chute. This is not only imparitive it corrects loose levels before they tighten completly. Be very careful not to procede any further until you have a cheese sandwhich. At that, pull all necessary lever stops and lift the long beam into position. If this is done correctly all main loading zones will behave like they are independant of each other yet flange with the flow of the coolant that your initially poured into the stolen sink bowl. See figure 5b to tie the base bunker in correctly, if you do not have manual 33, call your nearest spoon knife and fork dealer so that you can correct the angles of protective sands. At this stage of development you must adhere the flag stocks to the lower brackets that form the thirdary straw system. If not done correctly this could cause a reverse atmosphere throw and topple your neighboors tree. To avoid any situation involving flipped shell shocks, try inverting, then greasing, then smoking out all unlevel moldings. At this point you are almost there, as long as you remembered to wear gloves that have hooks imbedded on the lower side of the palms. You will be able to catch all shooting objects as they fly down the gasket bunker and into the netting that you put up at the begining of this procedure. Perhaps now would be a good time to mention not to invite any philips head screwdrivers as they could get jammed in the cylendrical tube that holds the fragile element that can or can not power the main reactor that some of these units have. It would be wise to know more on mosture vaporators when grabbing a hold of the green fuzzy control knob that twists off when you apply the main cusp to the long lever that you use to incline the plane up the bolt to the carbon vent. Only then you have to push out all the excess ball bearings that are used to roll the pully up the belt that powers the gutters in the unlikely event of a vertical thunderstrom. This might be a good time to consider insurance to this mearsure by contacting any local agent who specializes in hydrolic flange launching. Now that you have everything in its locked and wound juction, transform the sturcture so that it can hold the mass of sixty two bits. Measure correctly all fittings to the assembly for if off a micron of a nanofiber the whole constructure will adhere to jell-o like wallpaper. As you continue to pull the saw wheels further you will notice that some of the excess jingle bells will start to ring out in a low hum that twrills the fan in a broken like flaw. This is still in development and you will have to take measurements daily to send to corporate so they can find the correct vaulve placement of the release gear. Be very judgemental at this stage! Do not over hyperextend the maple fittings that fix to the exhaust lines. These enable the flow to shift from red to blue, usless it is in the southern hemisphere where the shifting is from green to yellow. As you know, the Jet Stream can and will effect all that you do with the portion of the sting that glues down the pretty racing stripes you placed on the side. Most professionals will tell you that they cannot tell the differance between stripes and flames, however flames could be misunderstood as actual fire which could set of the safety features that will jetison the whole construction out to the international space station for repair. At that note, you are best to install modest racing stripes. To finish tie a breadtie to the end and call it good. Any more instructions are strickly prohibited by the federal limitations commity.